
Option A – Using Tre5 Latches:
1. Remove the lower bolt on the driver side tailgate striker plate.
2. Install the longer ball stud with provided thick washer and low profile jam nut. The washer will go between the ball stud base and striker plate.
3. The low profile jam nut goes behind the taillight opening (Apply blue thread locker Loctite)
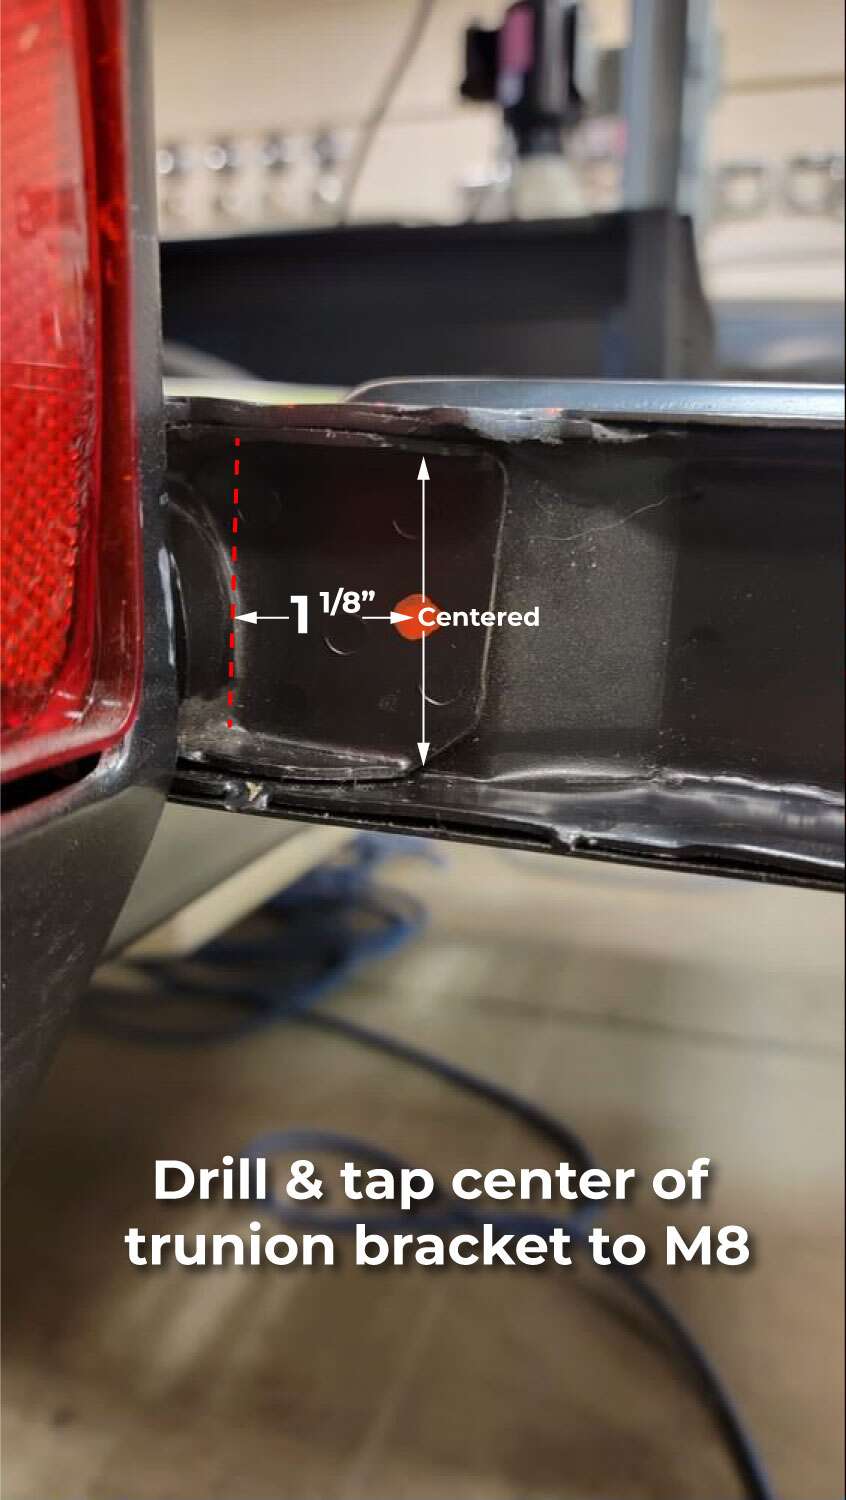
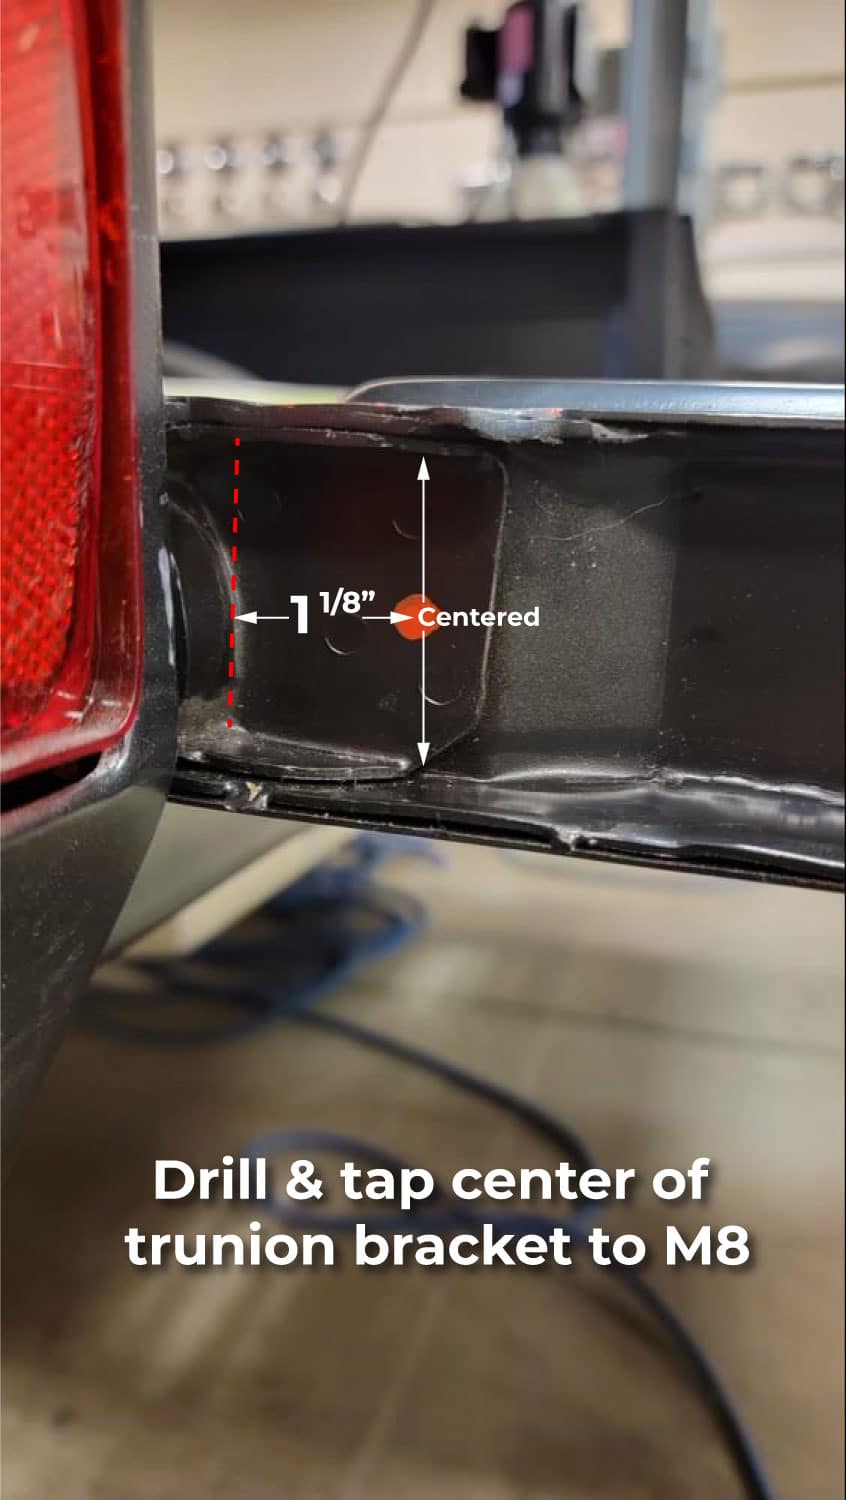
4. On the lower portion of the tailgate trunion bracket drill and tap a 5/16NC hole or use the supplied 5/16” rivnut (rivnut gun required to install) instead of tapping.
5. The hole will be located 1-1/8″ up from the top edge of the bracket and center of the tailgate.
6. Insert the shorter provided ball stud with blue thread locker Loctite.
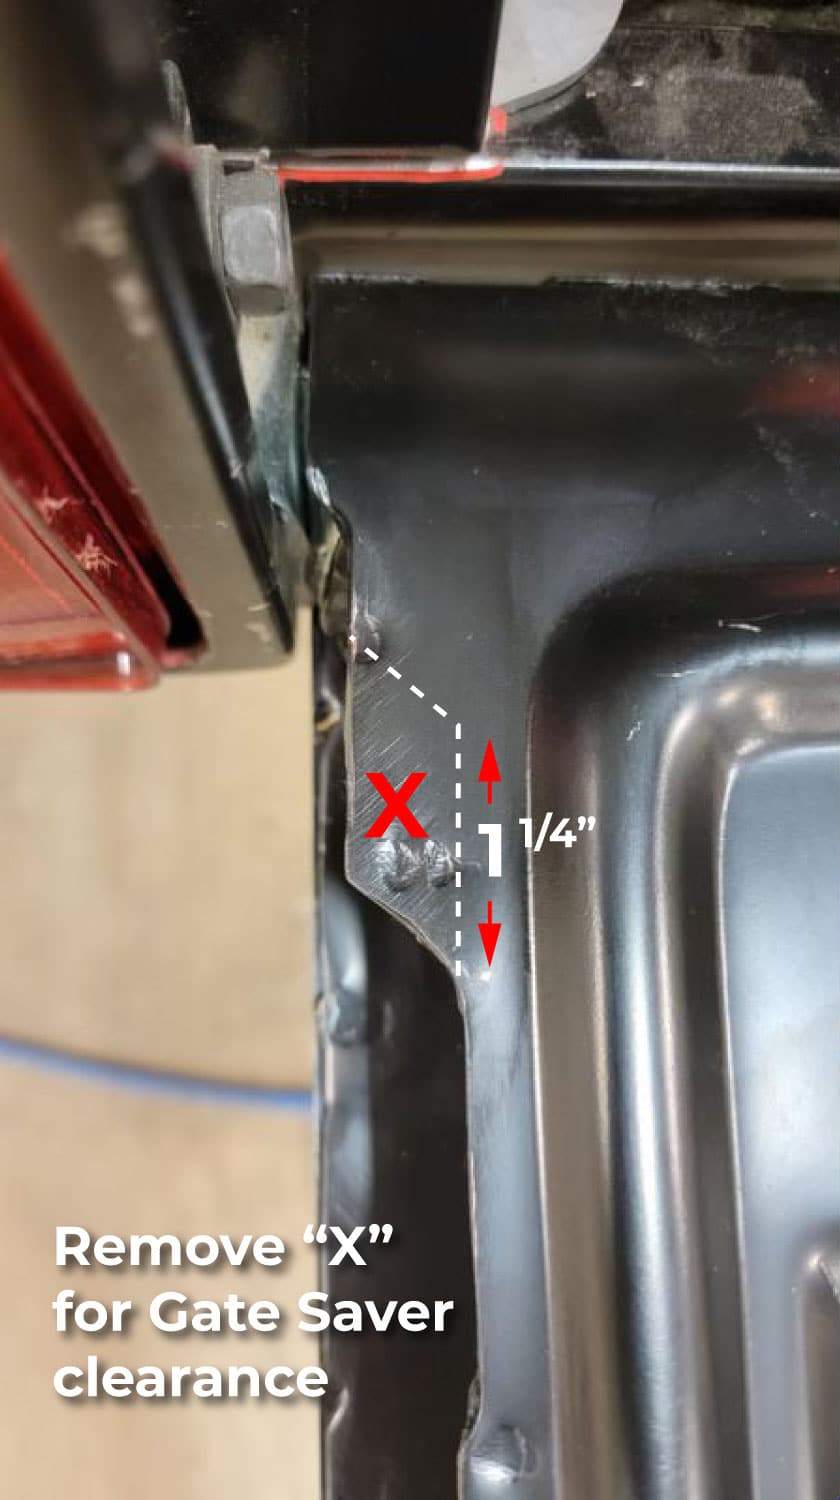
7. The only clearance needed on the tailgate is where the Gate Saver shaft passes the bottom of the gate.
8. Reference picture below and remove enough material for optimal clearance. If your tailgate is painted take your time with an air saw or die grinder and touch up any bare metal edges.

9. Attach your Gate Saver with shaft pointed down.
Note: When using the Tre 5 easy latches the cable will push up against the Gate Saver. If the cable passes the strut and wedges between the inside edge of the gate and strut you may want to remove a bit of the inside edge of the tailgate for more clearance. Another option is to remove the driver side cable entirely. *If the weight applied on the tailgate isn’t excessive one cable is found to be sufficient*
When you first close and open your tailgate after installing your gate saver make sure you check clearances in all areas where it may have close contact. Open slowly and check cables and gate saver function while opening slowly. All tailgate gaps are different and there’s limited adjustment.
Option B – Using Stock Latches:
When using stock latches. *Disclaimer* Use your own judgment on the weight applied to your tailgate when using this option.
1. On the driver side inner box panel Drill a 5/16 hole 3″ down and centered from the lower stock tailgate latch bolt hole
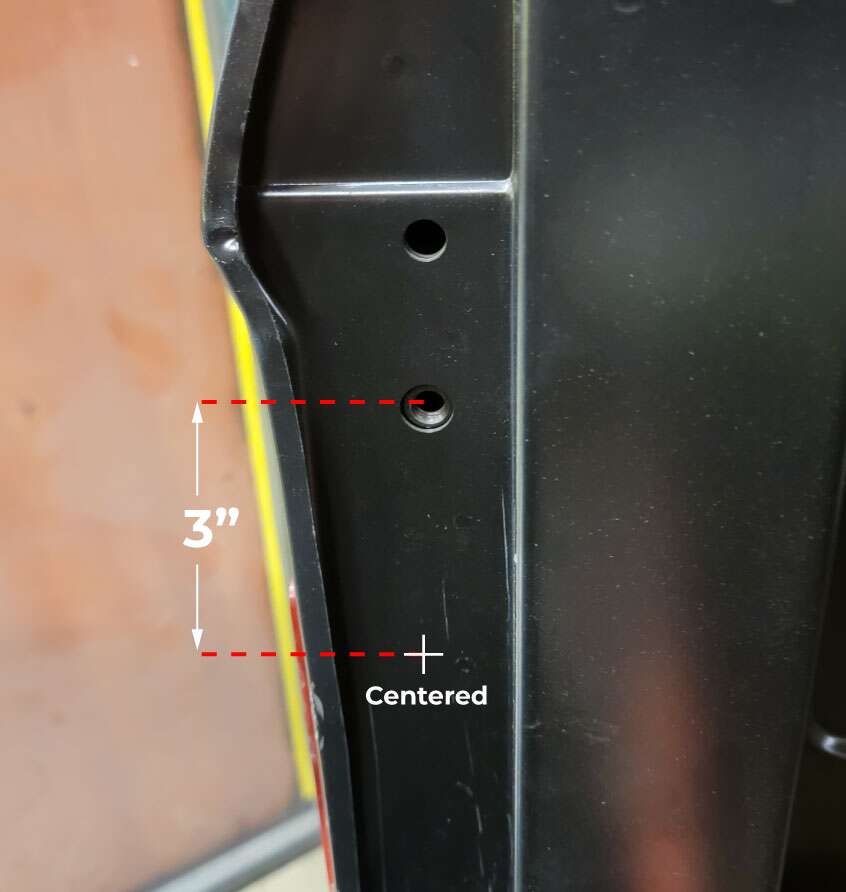
2. Take the longer of the two balls studs with a thick washer and the LS Fab support backet. Install the ball stud and washer in the hole of the larger end of the support bracket. Bolt the assembly to the box side where you just drilled the hole with the supplied jam nut and the small end of the support bracket facing down. Once tight and aligned straight up and down, drill a second 5/16” hole and install supplied button head bolt and jam nut.
3. The low-profile jam nut goes behind the taillight opening (Apply blue thread locker Loctite).
4. On the lower portion of the tailgate trunion bracket drill and tap a M8 hole or use the supplied M8 rivnut instead of tapping. (rivnut gun required to install). The hole will be located 1-1/8″ from the top edge of the bracket and centered. (Reference Picture)
5. Insert the shorter provided ball stud with blue thread locker Loctite.
6. The only clearance needed on the tailgate is where the Gate Saver shaft passes the bottom of the gate.
7. Reference picture below and remove enough material for optimal clearance. If your tailgate is painted take your time with an air saw or die grinder and touch up any bare metal edges.
8. Attach your Gate Saver with shaft pointed down.
9. On your stock latch arms you will need to remove the driver side metal arm to make clearance for the gate saver. You can grind off the pressed rivet that attaches the arm to the latch. You will be relying on the passenger arm to support the weight of the tailgate.
*Again, use your discretion on the amount of weight applied to the tailgate the gate saver is not designed to hold more than the tailgate. *
When you first close and open your tailgate after installing your gate saver make sure you check clearances in all areas where it may have close contact. Open slowly and check cables and gate saver function while opening slowly.
All tailgate gaps are different and there’s limited adjustment.
For any questions or concerns with your install, don’t hesitate to email us at [email protected]

0 Comments